Description
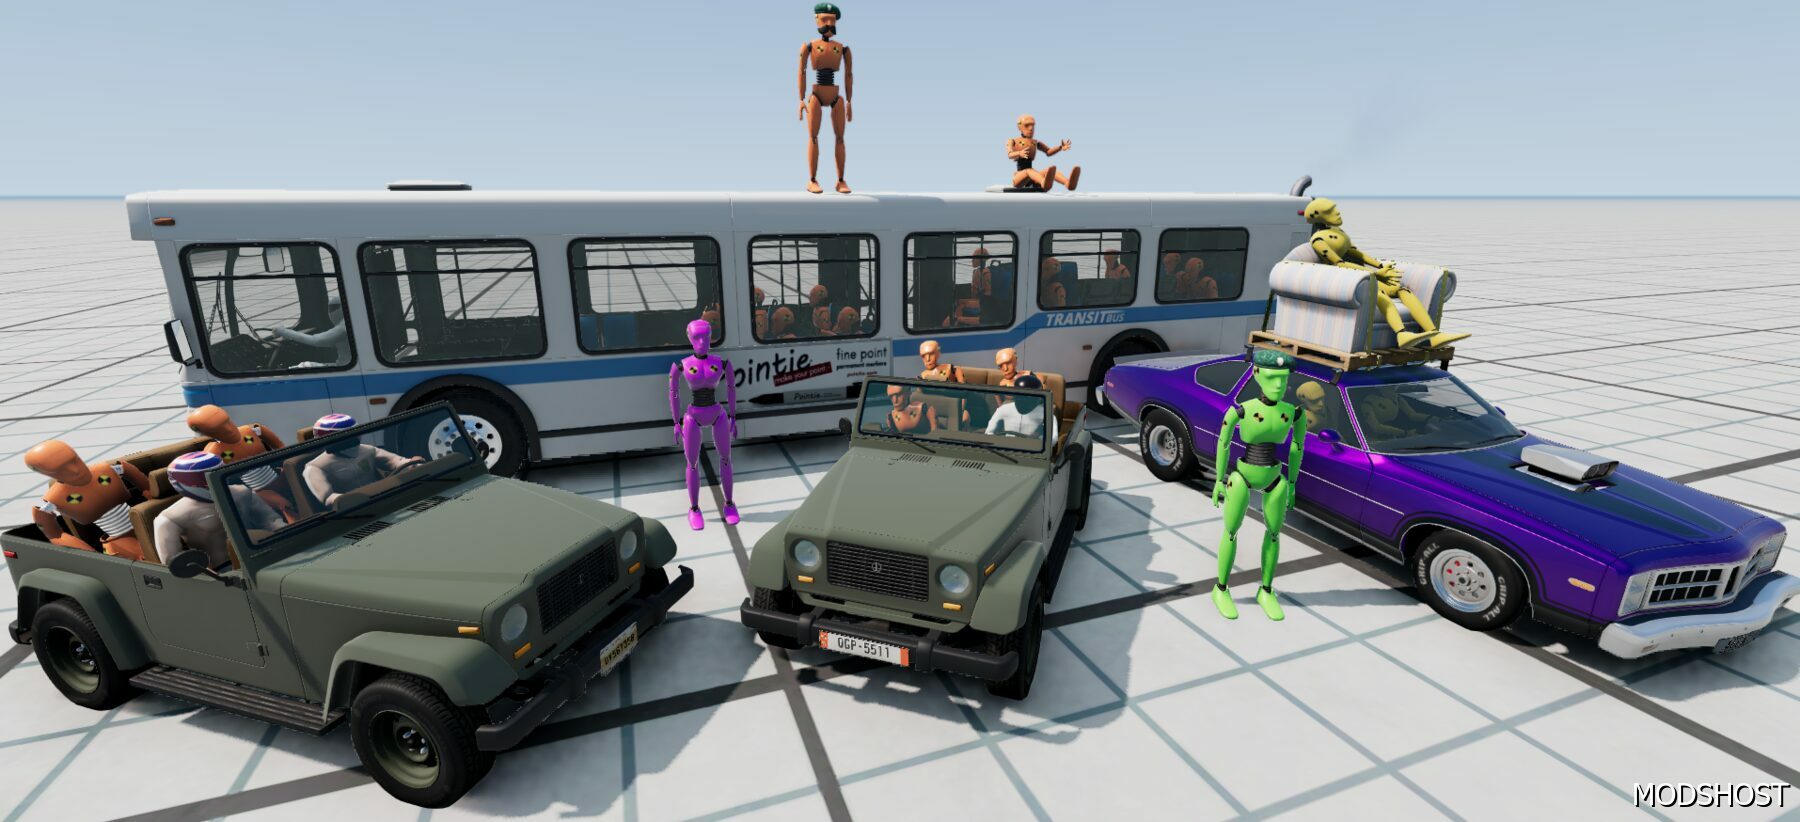
The Universal Dummy Mod
The spiritual successor to ‘Drivers, Passengers and Loads’ by Synsol!
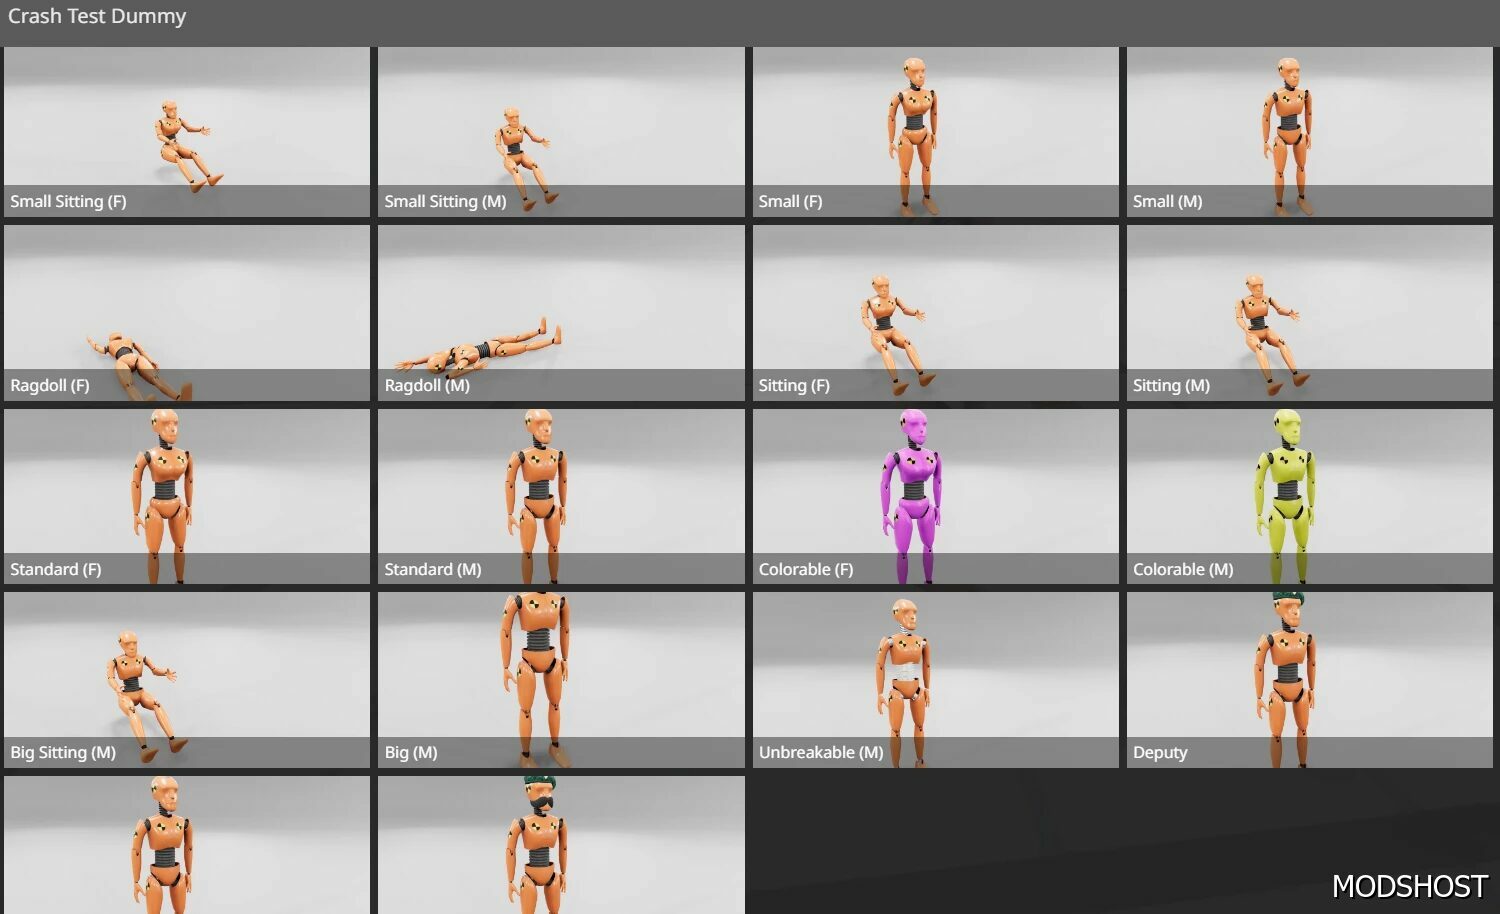
This mod gives you the ability to add crash test dummies or stunt drivers to any car, supporting all vanilla vehicles and theoretically most mods! Additionally it includes a standalone dummy as a prop, and dummy character for walking mode which is an improved version of one of my old mods.
Warning, some things might be a bit jank, since I initially started this mod over 2 years ago when I had zero experience, I have remade most things from scratch since then but I don’t have the time to redo literally everything in it.
It is important to read the instruction manual below to use the mod correctly. Due to various game limitations it is not as straightforward as other mods.
The first step if you want to put the dummy in your car is selecting a special part in the license plate design slot in the parts selector, like with my other mods.
At this point there already 2 exceptions though. The SP Dunekicker doesn’t have this slot, so the required part is under the Additional Modification slot. The Wentward bus is very different from other vehicles in terms of interior, so I have made a separate dedicated part for the dummies in its parts selector, the normal one will not work. These are the only exceptions at this point, but more will appear later.
Already after this step, a dummy driver should appear inside of the car. If you are using a base game vehicle, it should already be sitting in the correct position, but on mod cars it might be off. It might result with clipping with the seat or other parts of the vehicle, or even sitting on the wrong side. That is because the seats are all in slightly different positions between vehicles.
To fix this, I have added a “Positioning Setup” slot with 2 options. You should only use it on mod cars. Base game cars additionally have a default option that manually defines the position. If for some reason the position is wrong on a vanilla vehicle (for example an RHD variant of the Covet), there will be another dedicated option there to fix it.
If you choose the first option, the position of the dummy will update automatically, BUT IT FORCES YOU TO RESET THE CAR AFTERWARDS because the dummy ‘explodes’ on first spawn! Believe me I tried everything I could to fix this but I have no idea why it hasn’t worked. Resetting should be done via the ‘reset physics’ option (I key on default settings) or ‘recover vehicle’ option (Insert key on default settings). ‘Reload vehicle’ (ctrl+R by default) will not work!
This option works by changing the position of the dummy to where the mod thinks it should be based on the position of the driver camera in the car. If the camera is set up wrong in the mod, the position will be wrong and you can’t change it afterwards. For cases like this the second option is preferable.
The second option will show you a message on the UI in the top left corner, giving you values to set in the Tuning tab. Using these values you can position the dummy manually, you can tweak them like you want. The values are in the ‘Driver and Passengers’ category, in a ‘Manual Offset Setup’ sub-category. For base game vehicles, there is a similar set of values called ‘Automatic Offset Setup’ that you can use to similarly tweak the position in them. If the dummy starts shaking, tweak the position by 1 – 3 cm forward or back, that should fix it.
The mod includes simulated interior collision for the dummies, so they will hit the dashboard and steering wheel on impact. The default behavior is set for LHD vehicles (steering wheel on the left side), so when the steering wheel is on the right you will have to change the behavior in parts selector, EVEN FOR BASE GAME VEHICLES! Additionally some vehicles already have dashboard collision, and duplicating it will lead to issues, visible by the dummy shaking a lot. And on top of that some vehicles have a tilted steering wheel too. There are options in the mod to deal with all of this.
To check the collision setup on a vehicle, use the Triangle Visualization (Ctrl+T). If you see a green layer over the dashboard before adding the dummies, it means there is default collision there. You might have to move your camera partially inside of the dash to see it. Use Ctrl+T again to disable the visualization.
To make it easier for you, here’s a list of base game vehicles that need changes in this slot (but I can’t possibly check every single mod in existence so mod cars are up to you):
Autobello Stambecco: LHD interior setup (no collision), tilted steering wheel physics
FPU Wydra: You should remove interior collision completely, there is nothing to collide with, and the handlebar has collision by default
Gavril T-Series: tilted steering wheel physics
Ibishu Covet: interior setup without collision, which one you choose obviously depends on where the steering wheel is
Ibishu Miramar, Ibishu Pigeon, Ibishu Wigeon: RHD interior setup
SP Dunekicker, SP Rockbasher: LHD interior setup (no collision)
Another thing that can go wrong after placing the dummy is falling through seats, it happens if the seats have no collision at all. There is a special option to fix it. Don’t use it on base game vehicles. There is a similar option for the back seat passengers, that you will also have to use for most vanilla cars though, it’s on by default.
Now with the tutorial out of the way, I will briefly explain what the other slots in the mod do. They mostly provide some extra customization.
Car Strength Settings – Copied straight from my other mods, so you can have a rusty or armored car with a dummy.
Compatibility: BeamNG 0.31, 0.31 Other
Author: Agent_Y
How to install this mod (Full installation guide)
- Download the mod (ModsHost download guide).
- Find the mods folder on your computer
- Windows – Documents/BeamNG.drive/mods
- Copy the downloaded file to your Mods folder
- Launch the game and enjoy your mod!
- Problems? Ask for help!
Discover Mods Loved by Other Gamers!


Share Your Gameplay!
Submit a screenshot of this mod!
Submit a YouTube video.